
The Raspberry Pi is a small computer about the size of a deck of playing cards. It was originally conceived as a low-cost device that could be used to teach children basic computer skills. But, because of its low cost and versatility, it's been picked up by the hobbyist community and used to power hundreds of projects, from robot vehicles to home-network ad-blockers.
One use for the Pi is as a "Magic Mirror." The MagicMirror project uses a Raspberry Pi to display information from a number of online services and IoT devices on a monitor. With over a hundred modules available, you can display virtually anything you could want, including: calendars, news, weather, and to-do lists. You can even add information from your personal devices—for example, you can display what's currently playing on your Sonos system or the data from your Fitbit band. The original project called for the monitor to be mounted behind a two-way mirror (hence the name), but we've found it works great on its own as a sort of "command center" for your home.
This guide will explain how to use a Linux machine to turn the Pi into a Magic Mirror (for our Mac guide, look here). If you haven't got the Pi yet, for this project we would recommend the CanaKit Raspberry Pi 3 B+ kit, with a SanDisk 32GB MicroSD card (adapter included).
Step 1
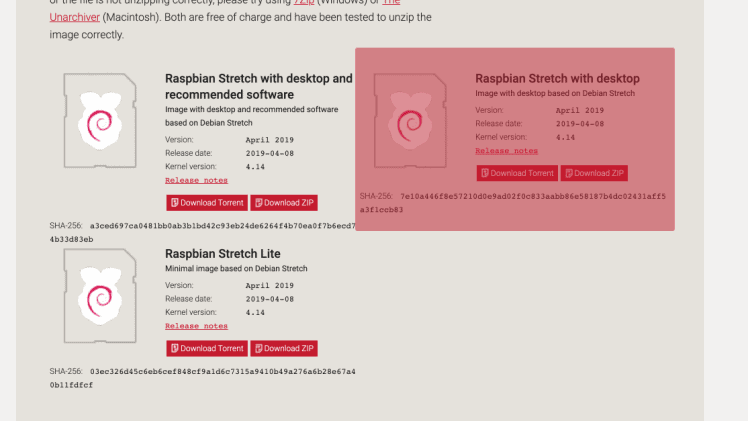
Download “Raspian Stretch with desktop” from the Raspberry Pi website. Do not install “Raspian Stretch Lite”, as it will not work with the MagicMirror software.
Step 2
Install balena Etcher on your Linux machine. You can get the latest version here.
Step 3
Insert the MicroSD card that came with your Raspberry Pi into your Linux machine.
Step 4
Open balena Etcher on your Linux machine. Click “Select Image.” Navigate to the “Raspian Stretch with desktop” file that you downloaded in step one. Then click “Flash.” You may be asked to enter your computer’s password.
Step 5
After balena Etcher has finished flashing the image, it will automatically dismount the MicroSD card. Once you are satisfied that it has finished, re-insert the MicroSD card and wait for your Mac to recognize it as an external drive with the name boot.
Step 6
Navigate to the MicroSD card’s root directory and add a blank file named ssh. Do not add an extension (.e.g .txt). This will allow you to connect to the Raspberry Pi using SSH.
WARNING If you skip this step, you will not be able to proceed.
Step 7
Physically remove the MicroSD card from your Linux machine. Insert the MicroSD card into the Raspberry Pi. Connect the Raspberry Pi to your network with an ethernet cable. Plug the Raspberry Pi in.
Step 8
On most networks, the Raspberry Pi will automatically be given an IP address by the DHCP server Before proceeding, you will need to find what this IP address is. If you have a Fingbox, or other network monitoring tool, it will tell what you what this is automatically. Alternatively, you can log in to your router and look at the DHCP tables.
Step 9
Next, we will SSH in to the Pi from the Mac. The default username is pi. The default password is raspberry. Assuming that its IP address is 10.0.1.179, you would type:
ssh pi@10.0.1.179
If prompted, type yes when asked to “accept authenticity.”
Then enter the default password, which is raspberry.
Step 10
Once in, you should update the software on the Pi. To do this, type:
sudo apt-get update && sudo apt-get upgrade
Settle in. This can take ten minutes or so.
Step 11
Once the software has updated, we will change some system-wide settings. To enter the configuration area, type:
sudo raspi-config
Step 12

First, you should change the default user password to a password of your choice. When you’ve done this, write it down. If you lose it, you’ll need to start over.
Next, you should change the Pi’s hostname (Network Options → Hostname). This can be anything, but if you intend to give the device a fully qualified domain name, you’ll want to keep it consistent with the rest of your network: e.g. mirror.your.house. If you don’t, just give it a descriptive name: e.g. mirror.
Next, you can change the localization options. Make sure that you change the locale, timezone, and Wi-Fi country to match your location.
Next, you should expand the file system so that the Pi can use the entire MicroSD card. (Advanced Options → Expand Filesystem).
Finally, you need to add the Pi to your Wi-Fi network so you can put it next to your TV or monitor (Network Options → Wi-fi).
When you are done, exit the configuration tool by selecting “Finish” and agreeing to reboot.
Step 13
The Pi will reboot. When it comes back up, it will have two IP addresses: one for the wired connection you set up earlier, and one for the wireless connection you just added. When you are satisfied that it is connected wirelessly (via the same process as in step 8), you can unplug the ethernet cable and the power cable and get ready to move the device to your TV or monitor.
Step 14
Using an HDMI cable, connect the Raspberry Pi into the TV or monitor you intend to use as the MagicMirror. Plug in the power cable. The Pi will boot up. Wait for it to connect to Wi-Fi.
Step 15
Once the Pi is back on the network, you need to SSH into it again. Because we have switched to Wi-Fi, we will need to use the other IP address to do this. Assuming that the other IP address is 10.0.1.180, you would type:
ssh pi@10.0.1.180
As before, type yes if asked to “accept authenticity.” Then enter the password you set earlier.
Step 16
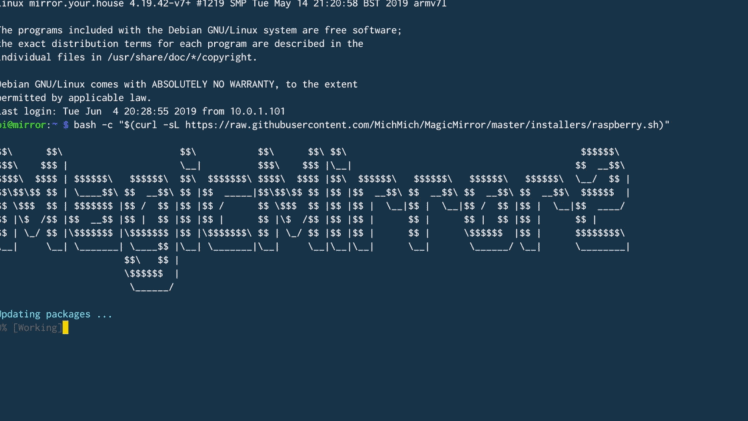
Now, we need to install the MagicMirror software. To this, type:
bash -c "$(curl -sL https://raw.githubusercontent.com/MichMich/MagicMirror/master/installers/raspberry.sh)"
Step 17
Sit back and wait. The MagicMirror software can take up to twenty minutes to install.
Step 18
During installation, you will be asked “Do you want use pm2 for auto starting of your MagicMirror (y/N)?” and “Do you want to disable the screen saver? (y/N)?” In both cases, type y, and press enter.
When finished, you should see the MagicMirror’s default screen on your TV or monitor.
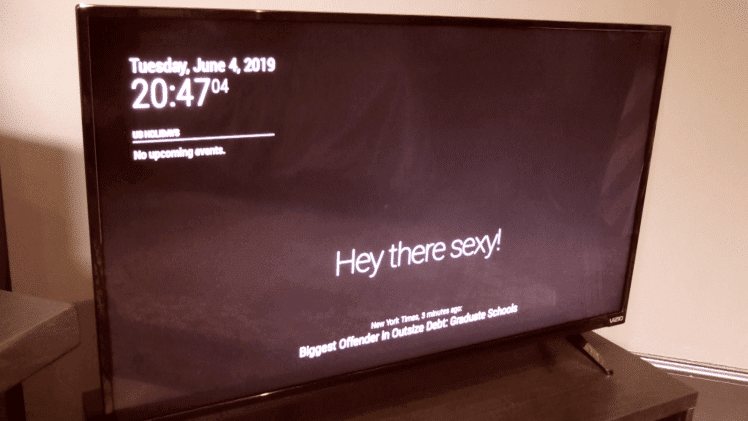
If you do not see this, reboot the Raspberry Pi.